Fall Gardening: How to Grow Garlic

I love garlic. I put copious amounts in everything and you haven’t lived until you’ve tried 40 Clove Garlic Chicken. And now, as the weather cools down and you bid farewell to your summer garden, it is the perfect time to start thinking about planting garlic.

When Should I Plant Garlic?

For most regions, you plant garlic in the fall for next year’s crop because garlic needs a period of cold weather (called vernalization) in order to be viable. In Chicago and places with similar climates, mid-September through mid-November is ideal for planting. It is more difficult to grown garlic in warm regions (i.e., zones 7-9), but it is certainly not impossible. (Unfortunately, garlic heads may be smaller.) Areas with mild winters may not provide the vernalization needed by many garlic varieties. However, you can cold stratify and simulate winter by putting your garlic in the fridge for about 4 weeks before planting.

Should I Plant Garlic From the Grocery Store?

I know it’s tempting to just stick garlic in the ground from the grocery store and call it a day. Don’t do it, though! If you get garlic from a good seed seller or producer, you’ll be able to pick from so many different heirloom varieties, which often have better flavor than garlic from the grocery store. Grocery store garlic may also be treated (and therefore not viable for growing) or carry disease. However, you if have a good farmers market near you, you can try picking up some specialty garlic there and planting it. I got my seed garlic this year from Seed Savers Exchange, but you can probably find some at your local garden center.

Softneck Garlic Hardneck Garlic

What Type of Garlic Should I Grow?

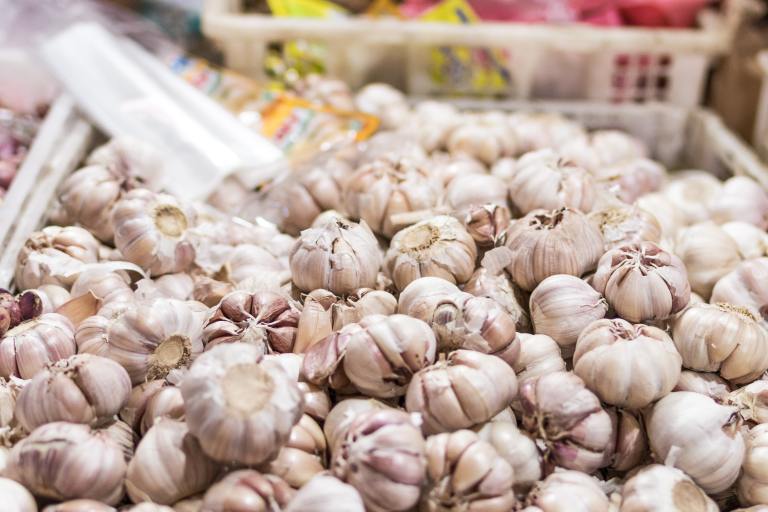
There are two types of garlic: hardneck and softneck. Hardnecks develop a hard stalk in the center of the bulb, which softnecks don’t. Most people say hardnecks, which are the type you want to be growing in the Chicago region, have bigger bulbs and more complex flavors since they come in so many different varieties; they also produce edible scapes in the spring, which you can also harvest. However, softnecks, which you are likely to find in your grocer’s produce department, can be stored for longer periods of time. Because they are less hardy, softneck garlic tends to grow better in milder climates so gardeners in more temperate zones can try growing it.

Where Should I Plant My Garlic?

Though I continually sing the praises of fabric grow bags, I don’t grow my garlic in them; I choose a sturdy wooden container. Though garlic needs winter to start producing bulbs, it gets COLD in Chicago and fabric bags just don’t protect garlic enough and you end of with no garlic. (Ask me how I know.) Garlic needs plenty of sun and space, since you want to plant a fair number of bulbs to get a good crop. Plant individual cloves, pointy side up, 2 inches apart, in well-draining compost-rich soil. Once you’ve chosen a sturdy container (a raised bed is even better) and planted your cloves, be sure to cover with at least 6 inches of mulch; I like straw.

Garlic scapes harvested earlier this year

When Should I Harvest Garlic?

The cool thing about hardnecks is that you get two harvest from them: scapes and bulbs. In June, your garlic will start to sprout green-onion like stalks in the center. They are delicious (try this Garlic Scape Pesto Recipe)! Even if you don’t like the flavor, though, you need to harvest the scapes so your garlic puts all of its energy into growing bigger bulbs. Once you’ve harvested the scapes, it’ll be about a month before you can harvest the bulbs.

<span class="has-inline-color has-vivid-red-color">Tequia Burt</span>
Tequia Burt

Tequia Burt is a Chicago-based editor, writer, content creator, and brand storyteller with 20 years of experience. In addition to being the Editor in Chief of Backyard Chicago Garden, she is the Founder-CEO of Content[ed.], which provides custom content and strategy to businesses.

It’s Time to Start Planning Your Fall Garden

This is the most bittersweet time of year for gardeners—just as you’re harvesting the fruits of your hard labor, the leaves in your garden are starting to yellow indicating that fall is near. It’s the best of times, and the worst of times.

However, even as you begin to clear out spent vines, never fear: Some crops thrive in the waning days of summer and the cooler autumn, so now is the time to start planning your fall garden.

This past weekend, I began mapping out what my fall/winter crops will be and where they’ll live in the garden. The following is the list of plants that made the cut.

Waltham Broccoli

This is a new one for me. I tried to grow broccoli without much success the first year I gardened, so I’ve avoided it until now. I figured I’ve learned a ton by now, though, and decided to give it another shot. This variety is particularly cold-hardy, so it is especially suited to growing in the fall. Check out this story on how to grow broccoli successfully this fall.

When to plant: Transplant seedlings at the end of August or in early September. Broccoli tends to bolt in temperatures above 80 degrees, so make sure you avoid planting it during a heat wave.

Sunlight requirements: Though broccoli doesn’t like it hot, it really likes it sunny so give your plant at least six hours of sunlight daily.

Pusa Gulabi Radish

I love the spicy bite of radishes, but they’re a bit too pungent for my daughter, Molly, though she like the flavor. That’s why I’m growing Pusa Gulabi this year, as they are, apparently, on the milder side. An Indian winter radish, Pusa Gulabi is a brilliant pink color and was specifically bred with high amounts of carotenoids, anthocyanins, and vitamin C to make it extra nutritious.

When to plant: Thought it is a winter radish (radish generally grows best in 50- to 65-degree temperatures), this variety can tolerate summer temperatures so feel free to plant seeds right away. Succession planting every 7-10 days will ensure a continual crop of radishes this fall.

Sunlight requirements: Radishes require at least 6 hours of full sun per day, but they are tolerant of some shade.

Sugar Snap Peas

Another favorite in my household are sweet and crunchy sugar snap peas. Though most people associate them with spring, I’m going to try growing them in the fall this year.

When to plant: These take 100 days to mature, so it’s a good idea to get seeds in the ground by mid-August. Even though this is a cool-weather crop, the seeds need a bit of warmth to germinate so planting them in the last days of summer should give them an initial boost.

Sunlight requirements: Peas require full sun, but if it’s still hot out they can also thrive in partial shade.

Cour Di Bue Cabbage

I chose this variety because it is tender and fairly compact, so it should be do well in containers. An Italian heirloom variety, it ends up being about 3 to 4 lbs.

When to plant: For fall harvest, it’s best to plant cabbage midsummer. This variety, however, is a short-season crop so I recently direct sowed seeds outside. Keeping my fingers crossed. Otherwise, transplanting a cabbage seedling now is a good idea.

Sunlight requirements: Cabbage needs at least six hours of full sun each day.

Purple Dragon Carrots

Carrots are sweeter in cold weather, so why not grow them for fall? This variety supposedly appeals to picky kids and adults, so with a son who is a finicky eater, I’ll take all the help I can get! The carrots are also a striking reddish-purple color, which will certainly jazz up the salads and veggie trays.

When to plant: Carrots can take up to 21 days to germinate so put them in the ground now! To encourage them to sprout, make sure you keep the seeds moist at all times. Once they have sprouted, you have to thin them out to ensure they have run underground to grow.

Sunlight requirements: Full sun but can tolerate partial shade.

Rocky Top Lettuce Mix

If you’re going to put in the time and effort to grow lettuce, it might as well be a variety you can’t find in stores. This blend has several different, brightly colored varieties.

When to plant: Lettuce hates hot weather, so end of August and early September is the perfect time to plant it.

Sunlight requirements: Lettuce can tolerate partial shade.

Japanese Giant Red Mustard Greens

These with its strong, almost garlic-like mustard flavor is my favorite variety of mustard greens. I LOVE it. Seriously. They are easy to germinate and easy to grow and taste best in cool weather.

When to plant: These can take anywhere from 10 to 20 days to germinate, but I’ve never had them take longer than 10 days. Succession plant every 10 days for a continual harvest. They don’t really like hot weather, so take that into consideration when planting.

Sunlight requirements: Full sun but tolerates partial shade.

<span class="has-inline-color has-vivid-red-color">Tequia Burt</span>
Tequia Burt

Tequia Burt is a Chicago-based editor, writer, content creator, and brand storyteller with 20 years of experience. In addition to being the Editor in Chief of Backyard Chicago Garden, she is the Founder-CEO of Content[ed.], which provides custom content and strategy to businesses.

Recipe: Tzatziki Sauce

I have had a remarkably productive crop of cucumbers this year. Which is just fine because we love cucumbers in my house. In fact, one of my family’s favorite sauces is tzatziki sauce, which is made with yogurt and cucumbers. Though you’ll most often find this Greek sauce on the menu next to gyros and falafels, it is amazingly good on lots of things. Put a dollop on your soup or smear it on your sandwich if you require a tangy sauce with a crunch. Try it!

Tzatziki Sauce

Prep Time 30 minutes

Ingredients
  

  • 1 Cucumber, deseeded and finely chopped
  • 1 Lemon, about 2 tbsp of juice
  • 1 tsp Champagne vinegar
  • 1.5 cups Plain Greek Yogurt, Fage preferred
  • 3 tbsp Dill and mint, chopped
  • 2 tbsp Olive oil
  • 1 Small Garlic clove
  • Salt, to taste

Instructions
 

  • Deseed and finely chop one cucumber. Most recipes will tell you to grate it seeds and all, but I find I don’t have to salt the cucumbers and strain the water off if I just deseed it. I also like the crunch of larger pieces of cucumber. Chop herbs and smash or finely chop garlic.
  • Put yogurt into bowl. It is also important to use Fage Greek yogurt because it is thick and has already been strained – this way, you won’t have to do it. If you don’t have Greek yogurt, you can strain regular yogurt to a Greek yogurt consistency. First, line a sieve with a coffee filter and then set over a bowl. Spoon in 3 cups of yogurt to yield 1 ½ cups ofGreek-style yogurt, refrigerate and let drain for two hours.
  • Add, chopped cucumbers, herbs and garlic to yogurt.Stir and then add lemon and then vinegar. Slowly stir in olive oil and add salt to taste.
<span class="has-inline-color has-vivid-red-color">Tequia Burt</span>
Tequia Burt

Tequia Burt is a Chicago-based editor, writer, content creator, and brand storyteller with 20 years of experience. In addition to being the Editor in Chief of Backyard Chicago Garden, she is the Founder-CEO of Content[ed.], which provides custom content and strategy to businesses.

5 Tips for Growing Broccoli in Containers and Raised Beds

When I first started gardening, the crop that I was most excited about growing was broccoli.

I decided on a springtime planting in one of my raised beds. Though I nurtured that plant obsessively –I got a pretty stalk with lots of green – a head never sprouted. It was a most frustrating experience.

But after much more practice in the garden coupled with a ton of research, I’ve decided to give broccoli another try. Here are some of the things that I will do to make sure I get a bumper crop of broccoli this year. I’ll let you know how it goes!

Choose your growing season wisely.

Opting for growing broccoli in the spring of Chicago was probably a mistake. An inconsistent season weather-wise, growing spring crops in Chicago – where it can snow even in April – is a difficult proposition. About the only thing I can ever grow successfully in the spring is greens. Anyway, back to broccoli. This year, I decided to try growing broccoli in the fall. Since broccoli can take 50-60 days from transplant to harvest, starting plants in August gives them a long enough runway to give them a good growing season in the waning days of summer so they can mature in cooler fall days. (Broccoli that matures during cool weather tastes sweeter than at any other time.) Also, broccoli can withstand temperature down to 20 degrees, so you can still be potentially harvesting it in December – depending on Chicago’s erratic weather, that is.

Plant it at the right time.

To figure out when to plant broccoli is easy-peasy. If you are direct sowing in your garden, plant seeds 85 to 100 days before the average first fall frost in your area. According to the Farmers Almanac, the first frost date in Chicago is Oct. 29 – hence the perfect time to plant seeds is in early August. So, get those seeds in the ground right now. If you decide to transplant a seedling rather than direct sowing, plant it 10 days to the “days to maturity” for the variety you’re growing and then count backwards from your expected first fall frost date. For Waltham, the variety of broccoli I’m growing, it takes 50-60 days to maturity from transplant. So, the ideal time to plant a Waltham transplant would be late August to early September.

Choose the right size container – and space properly in your raised bed.

One of the biggest mistakes novice container gardeners make is either choosing a too-small container or planting crops too closely together in their raised bed. For just one broccoli plant, you’ll need a 3- to 5-gallon container that is at least 12 inches deep; I’m growing two plants per each 10-gallon fabric container. (I like fabric containers with handles because they allow me to chase the light in the garden and move plant around with ease.) In a raised bed, plant each sprout 15-18 inches apart.

Pick the right soil, water consistently and plant in full sun.

Broccoli needs loose, well-draining soil to grow properly, so choose soil wisely. The plants prefer slightly acidic soil, rich in organic nutrients so add compost to the planting hole, as well as a good layer on top. Make sure when you’re planting to tamp down the dirt in the pot or in the bed because brassicas like compacted soil. However, broccoli is prone to root-rot so it’s really important to water consistently to help avoid root rot – you want to make sure the soil is always damp, but you don’t want to overwater as broccoli don’t like wet feet. And last but not least, broccoli plants need a LOT of sun – at least six hours a day. The tricky thing about broccoli is that though it requires full sun, the plant will also start to bolt at temperatures above 80 degrees. This is where having your plants in fabric containers with handles come in handy – you can move the naturally cooler containers around to either sunnier or less-hot spots in your garden.

Fertilize and manage pests consistently.

Broccoli is a heavy feeder so it’s vital that you fertilize them at planting with a well-rounded fertilizer (I like Espoma Garden Tone) and a couple of times during the seasons after that. Broccoli also attracts pests like cabbage loopers. You can control them with BT or Bacillus thuringiensis, which is a soil-born bacterium that kills caterpillars like that cabbage loopers that love to munch on your broccoli but won’t harm beneficial insects.

<span class="has-inline-color has-vivid-red-color">Tequia Burt</span>
Tequia Burt

Tequia Burt is a Chicago-based editor, writer, content creator, and brand storyteller with 20 years of experience. In addition to being the Editor in Chief of Backyard Chicago Garden, she is the Founder-CEO of Content[ed.], which provides custom content and strategy to businesses.

10 Ways to Use Up Those Summer Herbs

If you’re like me, you have more herbs than you know what to do with in your garden. Beyond drying and freezing, I have to find creative ways to make sure I’m not letting all that herby goodness go to waste. There are so many things you can do with herbs and the following is a list of some of the things I’ve been doing with my herbs this summer.

Stir up Pesto

One of the tried-and-true standbys for using up an abundance of basil is to make delicious pesto. A spicy sauce made with basil, garlic, Parmesan-Reggiano, pine nuts and olive oil (I also add a Fresno pepper for bite), you can use pesto on everything from pasta to sandwiches or even as a marinade – and, bonus, it freezes really well, too. (Freezing it in ice trays and then storing the cubes in a storage bag is the way to go.) Here is a simple, basic pesto recipe that should take you no more than 15 minutes. The sauce is traditionally made using a mortar and pestle, which is how I like to do it, but feel free to use a food processor.

Basic Basil Pesto

Prep Time 15 minutes
Course Main Course
Cuisine Italian

Equipment

  • Mortar and Pestle or Food Processor

Ingredients
  

  • 2 cups Basil
  • 2 Garlic cloves, chopped
  • 1/4 cup Pine Nuts
  • 1/2 cup Olive Oil
  • Salt, to taste

Instructions
 

  • Put basil into food processor or mortar andpestle to process.
  • After processed, add garlic, pine nuts, andcheese.
  • Slowly drizzle in olive oil as sauce isprocessing. Add salt to taste.
Keyword Basil, Pesto

Arrange a Bouquet

One of my favorite ways to use herbs is to make herbal bouquets. Many herbs produce lovely flowers so it’s a great way to bring both the beauty and luscious scents from the garden inside. This is one that I made last week with my daughter, Molly. We used dill, Thai basil, Mexican mint, lavender and calendula.


Concoct an Herbal Oil Infusion

To take advantage of the beneficial properties of specific herbs, consider making an herbal oil infusion. Some oil infusions (comfrey, for example) may be good for scrapes and burns others for beauty serums and creams (lavender, for example). Make your own herbal oil infusion at home with the following recipe.

Recipe: How to Make a Long Herbal Oil Infusion

  1. Fill a one-pint jar with a tight-fitting lid about halfway to two-thirds with dried herb of choice. Cover leaves with preferred carrier oil, such as olive, avocado, coconut, or grapeseed.
  2. To make a long oil infusion, leave for six weeks and shake the jar a couple of times a day. After six weeks, strain the oil through cheesecloth.
  3. Add a 1/2 teaspoon of vitamin E to help preserve the oil. You can also add a few drops of essential oils like rosemary, lavender, or chamomile to make your oil even more beneficial.

Blend Chimichurri

I like to think of Chimichurri as a kind pesto … just made with parsley. An Argentinian sauce used as a marinade or as a table condiment, it is usually eaten with steak. But for those eschewing meat, you can also eat it with veggies or cheese. Here is a basic recipe.

Basic Chimichurri

Prep Time 15 minutes

Ingredients
  

  • 1 Cup Parsley
  • Few Sprigs of Oregano
  • 1 Small Shallot
  • 2 Cloves Garlic
  • 1 Small Fresno Pepper or Red Jalapeno
  • 1/3 Cup Red Wine Vinegar
  • 3/4 Cup Olive Oil

Instructions
 

  • Put parsley and oregano into food processor or mortar and pestle to process.
  • After processed, add garlic, shallot and pepper and process. Add vinegar.
  • Slowly drizzle in olive oil as sauce is processing. Add salt to taste.

Whip up Compound Butter

Compound butter is a great way to get the flavor of all the different kinds of herb you grew in the summer year-round. Easily frozen, there are a ton of different combinations. Here is a good simple recipe:

  • Get good butter. I like using European butters because they have more butterfat, hence making your compound butter extra creamy and delicious.
  • Soften butter to room temperature until it is easily stir-able—this will probably take a few hours.
  • Gather the herb of your choice. You can use either dried or fresh herbs, but if you’re using fresh, make sure the herbs have had several hours to air dry after rinsing before mixing them into the butter. You don’t want to mix water into the butter.
  • Chop finely and mix into butter. You can also add garlic, lemon peel, or even ginger. Experiment with flavors you like!
  • To store in the freezer, scoop the herb butter onto a piece of waxed paper or parchment paper. Shape it into a log by rolling it in the paper and wrap tightly on each end. I also put them in freezer bags to help prevent freezer burn.

Brew Herbal Infused Water

I love adding herbs to water to get all the beneficial nutrients. You can add just a bit to a cool drink and sip immediately for a delicious summer refresher, or steep herbs like tea for longer periods to wring out even more nutrients. To get even more of the medicinal benefits, some folks make what’s called a long herbal infusion. Check out the following recipe courtesy clinical herbalist Kathleen Raven Wildwood, founder of the Verona, Wisc.-based Wildwood Institute.

  1. Take one ounce of chosen dried herb.
  2. Place in a canning jar. Use a one-quart jar for leaves (such as basil), or hardy flowers (such as red clover), one-pint jar for roots, barks, or berries (such as rose hips).
  3. Cover completely with boiling water, stir with chopstick or knife and add more water until full.
  4. Place lid on and let sit four-to-eight hours for leaves or hardy flowers, eight hours for roots.
  5. When done brewing, strain and refrigerate. Infusion will keep for 48 hours in the refrigerator. Infusions may be reheated. (Do not boil, preferably. It is still OK to drink if it is boiled, but nutrients may be lost.) Infusions may be iced, sweetened, and milk may be added. Some do well with salt or tamari, such as nettle.

Infuse Vodka

Nothing could be better to use (or easier to make) for summer cocktails than infused vodka. For basil vodka, which is the perfect base for summery, refreshing drinks, grab a large bunch of fresh basil, stick the leaves in a mason jar with a tight-fitting lid, fill with plain vodka, seal the lid and sit the jar in a cool, dark place for up to three days. Taste it every day to get it to the flavor you prefer. After three days, strain out the basil leaves and pour yourself a cocktail! You can do with this with any herb you’d like.


Stir up Simple Syrup

Speaking of Happy Hour, you can get some of that same herbally goodness in your cocktails with herbal simple syrup. Here is a great base recipe.

Herbal Simple Syrup

Prep Time 26 minutes

Ingredients
  

  • 1 Cup Sugar
  • 1 Cup Water
  • 1/4 to 1 Cup Fresh Herbs

Instructions
 

  • Combine water, sugar, and herbs in a small sauce pan and bring to a boil. Stir continually until sugar dissolves and then simmer for1 minute.
  • Remove from heat and let syrup steep with herbs, about half an hour. Note the amounts of herbs will depend on the strength of the herbs themselves. You may, for example, need 1/4 cup of lavender but 1 cup of basil to get the strength of flavor you desire.
  • Cool and pour syrup into container through a mesh strainer to remove herbs. Store in the fridge for up to one month.

Shake Up Some Herbal Salt

Herbal salt is the easiest thing ever to make. For real. Just stick a spring of rosemary (or whatever) into your salt cellar and call it a day. You’ll have fragrant salt to add as a finisher to your dishes at the table.


Invent an Herbal Hair Rinse

There is nothing my locs like more than a good herbal rinse. I usually collect a few from my garden and let it sit in a jar with hot water for a few hours. Sometimes I add a hibiscus teabag and I always add a few tablespoons of apple cider vinegar.

Try this recipe. Grab handful of:

  • Lavender (moisturizes dry scalp, fights hair loss, increase circulation to scalp)
  • Chamomile (fights dandruff and dry scalp, restores shines, reduces hair loss)
  • Rosemary (prevents premature graying, stops hair loss, boosts shine, decreases dandruff)
  • Calendula (thickens hair, reduces dandruff, improves scalp condition, conditions)
  • Basil (increases scalp circulation, stimulates hair follicles for new hair growth)

Put herbs in large mason jar. Pour hot water over herbs and then add 3-4 tbsp. of apple cider vinegar. Let sit for a few hours.

<span class="has-inline-color has-vivid-red-color">Tequia Burt</span>
Tequia Burt

Tequia Burt is a Chicago-based editor, writer, content creator, and brand storyteller with 20 years of experience. In addition to being the Editor in Chief of Backyard Chicago Garden, she is the Founder-CEO of Content[ed.], which provides custom content and strategy to businesses.

Support These Black-Owned Seed Companies

One way to show love for the Black community during these times is to support Black-owned businesses. The following is a list of Black-owned seed sellers that I will try to keep updated. Happy shopping!

Black-Owned Seed Sellers

If you would like to be added to the list, or know of a Black-owned seed company not on the list, let me know!

<span class="has-inline-color has-vivid-red-color">Tequia Burt</span>
Tequia Burt

Tequia Burt is a Chicago-based editor, writer, content creator, and brand storyteller with 20 years of experience. In addition to being the Editor in Chief of Backyard Chicago Garden, she is the Founder-CEO of Content[ed.], which provides custom content and strategy to businesses.

Introduce These Deadly Predators to Your Garden to Fight Pests Naturally

Imagine, after waking up and having that first cup of coffee in your dewy garden that’s lit by morning sunshine, you decide to take a peek at the tomato plants you’ve been lovingly nurturing these past couple of months. And you’re met with this sight, straight from a horror scene:

Tomato Hornworm

These insects may be a part of the great circle of life, but there’s no reason for you to put up with them in your garden. One of the best ways to control pests organically is through the use of beneficial predatory insects. You can either attract them to your garden naturally or head down to your local nursery to purchase them.

So before doing this:

Angela Bassett Burning It All Down

Check out these six predators to add to your garden today.

Beneficial Nematodes

Beneficial Neamatodes

Tiny, microscopic “worms” referred to as beneficial nematodes have become a popular form of pest control, as they feed on more than 200 pests from up to 100 insect families. Nematodes grow beneficial bacteria inside their guts that when released inside an insect kills it within 24 to 48 hours. It’s important to pick the right type of nematode for your garden because each specific type targets a different pest.

Kills: Flea larvae, grubs, slugs, snails, and root weevils.

Ladybugs

Ladybug on Flower

There are as cute as can be, but they are deadly to annoying garden pests. A single ladybug may consume as many as 5,000 aphids in its lifetime. They are also an inexpensive remedy—I got a bag of 500 for $5 at my local nursery.

Kills: Aphids, chinch bugs, asparagus beetle larvae, alfalfa weevils, bean thrips, grape root worm, Colorado potato beetle larvae, spider mites, whiteflies and mealybugs.

Lacewings

Green Lacewing on leaf

I also picked up a fairly inexpensive package of lacewings at the same time I got ladybugs. Since the larvae are the actual predators, you usually buy them in egg form; since adults fly away, they need to be reapplied every couple of weeks.

Kills: Aphids, insect and moth eggs, mealybugs, scale, spider mites, thrips, and other soft-bodied insects.

Praying Mantis

Praying mantis killing prey

The Praying Mantis is the most fearsome of all garden predators as it can hunt and kill insects and small mammals (including, unfortunately, some beneficial garden insects and birds) three times its size. It is the only insect that can rotate its head a full 180-degrees, which helps them seek out their prey from all angles. I was so proud when I found a praying mantis in my garden last year because they are attracted to thriving gardens with good ecosystems.

Kills: As youngsters, they feed on aphids and mosquitoes. Adult praying mantis prey on larger bugs, such as moths and grasshoppers.

Assassin Bugs

Assassin Bug on leaf

There are thousands of varieties of assassin bugs, and all are voracious predators of irritating garden pests. Some varieties include Milkweed Assassin Bug, Spined Assassin Bug and Predatory Stink Bugs. They kill by poking their sharp mandibles into the pest’s body and injecting a toxin that immobilizes it and dissolves its innards.

Kills: Aphids, mealybugs, caterpillars and thrips.

Parasitic Wasps

Tomato hornworm with wasp eggs

If you thought that previous image of a tomato hornworm was scary, check this out. This tomato hornworm is on its way to a gruesome death because a parasitic wasp laid her eggs in his body.

Kills: More than 200 types of pests, including cabbage loopers, caterpillars, cutworms and tomato hornworms.

<span class="has-inline-color has-vivid-red-color">Tequia Burt</span>
Tequia Burt

Tequia Burt is a Chicago-based editor, writer, content creator, and brand storyteller with 20 years of experience. In addition to being the Editor in Chief of Backyard Chicago Garden, she is the Founder-CEO of Content[ed.], which provides custom content and strategy to businesses.

Black Farms Matter: 8 Black-Owned Urban Farms to Support

It has never been a better time to support Black farmers.

As the chorus of “Black Lives Matter” rang out across the United States in the past few months, Americans have become more likely to seek out Black-owned business. Citing “a surge in online searches for Black-owned businesses,” even Google has hopped on the bandwagon. The search giant now lets Black business owners list themselves as such, making it much easier for customers to find and support them.

But how many Black farmers are there left to support?

Right now, according to the USDA’s latest figures, Black farmers comprise less than 2% of all farmers in the United States. In a 2019 analysis, the Center for American Progress released a report detailing how the devastating effect of discrimination by the USDA itself led to black farmers losing 80% of their land from 1910 to 2007. “The impact of structural racism—or systematic discrimination by private and public institutions—over the course of U.S. history on the wealth of black families is staggering,” the report said.

However, despite those dire figures, Black-owned farms are growing, according to the USDA. Even as the overall number of farmers are shrinking, the number of Black farmers is on the rise. Despite the odds against them, Black farmers are reclaiming the earth and using it to heal racial traumas for whole communities and to foster a closer relationship to the land. Here are eight to support today.

Grow Greater Englewood
Chicago, IL
https://www.growgreater.org

Established in 2014, Grow Greater Englewood promotes community wealth-building through sustainable agriculture. Cooperative farming is a central aspect of GGE’s community organizing, which seeks to turn struggling neighborhood Englewood into a “food oasis,” and play an active role in the “real food revolution that can generate equity, prosperity and wealth for local residents.”

Root Life
New Haven, CT
https://www.rootlife.org

Praxis, the owner of Root Life, has been urban farming in New Haven for eight years, working as a fulltime farmer and environmental educator for Common Ground High School and volunteering with local agricultural organizations such as New Haven Farms, The New Haven Land Trust, The Yale Sustainable Food Project and The Yale Botanical Gardens. In addition to working for and volunteering for local agricultural organizations, Praxis also helps to establish local community gardens and facilitate after-school garden club programs.

Chi City Foods
Chicago, IL
https://www.chicityfoods.com

Founded in 2018 by Xavier Maatra, Chi City Foods is driven by the passion to provide poor and marginalized groups in Chicago with access to fresh produce and training opportunities in urban agriculture. The current incubator farm is located in Altgeld Gardens, one of the most isolated housing developments in Chicago. This community is in a food desert with only one convenience store located within two miles. As the farm grows, its priority will be to train and hire people directly from the neighborhood, especially youth.

Mother’s Finest Family Urban Farms
Winston Salem, NC
https://www.mothersfinesturbanfarms.com

Through the leadership of Mother/ Certified Beekeeper and Master Gardener Samantha “Foxx” Winship, Mother’s Finest Family Urban Farms promotes innovative farming practices, product development and operations. In addition to growing all kinds of produce, the farm cultivates bees, chickens, worms and mushrooms. They have even trained their children to handle basic farm operations, beekeeping, vermiculture, poultry care and growing food!

Your Bountiful Harvest
Chicago, IL
https://yourbountifulharvest.wixsite.com/yourbountifulharvest

Your Bountiful Harvest is a sustainable urban farm and garden consultation service that provides environmental and hands-on farm education classes on-site in your backyard, community garden, farmers markets and/or classroom. Non-GMO, organic and heirloom seedlings are also available for purchase during the Spring (mid-late May) and Fall (Mid-September).

Farms to Grow
Oakland, CA
https://www.farmstogrow.com

Farms to Grow lists three missions: 1) To promote the sustainability and legacy of Black farmers as well as sprout the next generation of small farmers; 2) To document and disseminate farm history to advance the public’s understanding of the important roles of Black farmers; and 3) To improve the access to urban food markets including schools, restaurants, and individual consumers for Black and other underserved farmers.

Fresh Life Organic
Houston, TX
https://www.freshlifehtx.com

Fresh Life Organic was launched in 2016 to provide agriculture assistance to urban and rural areas and was created as a response to a community need for fresh local veggies. Over the last few years, the farm has expanded and produced multiple farms and gardens from Houston to now around the world. The farm specializes in Aquaponics/ Hydroponics, row crop farming, operations, risk management, and marketing agriculture products and is best known for its sustainable agriculture planning designing, building, and maintaining of farms, gardens, and greenhouses.

Footprint Farms
Jackson, MS
https://footprintfarmsms.com/

Cindy Ayers Elliott founded this 68-acre farm with a focus on agritourism for community development in Jackson, MS. Growing and array of fruits and vegetables, raising meat goats, chickens, cattle, and horses, she believes that “planting seeds in the earth will grow fresh vegetables, however, planting a seed in the minds of young people will create a new universe of scholars.”

<span class="has-inline-color has-vivid-red-color">Tequia Burt</span>
Tequia Burt

Tequia Burt is a Chicago-based editor, writer, content creator, and brand storyteller with 20 years of experience. In addition to being the Editor in Chief of Backyard Chicago Garden, she is the Founder-CEO of Content[ed.], which provides custom content and strategy to businesses.

Lean on These 10 Essential Tools to Help You Find Success in Your Garden

When I first started gardening, I bought one of those ubiquitous garden sets with the standard five tools in a pouch; I had no idea of the inadequacy of my purchase. Over the years, I’ve learned which tools are important and which ones are just a big waste of money. The following is a list of my favorite gardening tools that go beyond just hand spades.

Vivosun Grow Bags

Vivosun Grow Bags

I’m a big fan of using grow bags in my garden. Besides being better for a plant’s root system, they allow me to move my crops to different part of the garden with ease. Buy now

Fiskars Garden Snips

Fiskars Multipurpose Garden Snips

This tiny, multipurpose pruner is my all-time favorite garden tool. This tool, which is a pruner on one side and a serrated knife on the other, is small enough to wield confidently in my small hands. I use it for harvesting, pruning, cutting wire and rope, and more. It’s the best tool, ever, and I highly recommend it. I also really like the Fiskars Micro-Tip Pruner. Buy now

Felco Pruner for small hands

Felco Pruner F-6 -Small Hands

Many garden tools are a little too big for my hands. That’s why I like this pruner; it’s designed for small hands. When you need pruners for a bigger job than the Fiskars Snips can handle, try this quality pruner. Buy now

Nitrile gardening gloves

Nitrile Gardening Gloves

I really hate those fancy leather garden gloves—it’s hard to move your fingers around freely and they are difficult to wash. I understand needing heavy-duty work gloves like that if you’re a farmer, but they’re a little much for backyard/balcony gardeners. I really like the lightweight nitrile gloves, which are less constricting and more easily washable. You can usually find them at any big box store or Buy now.

Marathon Yard Rover Wheelbarrow

Marathon Yard Rover

If you’re a backyard gardener with more space than a balcony, a wheelbarrow will be vital. I waited years before getting a one and I wish I hadn’t. Buy now

TomCare Gardening Chair

Gardening Chair

I might have a house with a backyard, but it’s still in the city, which means it’s not that big. I have to maximize my space and don’t have room for big things like potting benches. That’s where my gardening chair comes in. It saves my back from a lot of bending and, often, I sit right in the middle of the backyard to pot my plants. Buy now

Long, wood-handle rake hand Craftsman cultivator

Craftsman Rake Hand Cultivator

This is one of my most-used garden tools; I use it more than a spade! Use the long rake for raised beds and the short handheld tool for your containers. Buy now

Cobrahead Mini Weeder

Cobrahead Mini Weeder

This tool makes short work of weeds—even those prickly thistles with deep taproots. This is the mini version of the tool, which, IMO, is ideal for container gardeners. Buy now

hundreds of wicker baskets

Wicker Baskets

Head down to your local secondhand shop and load up on inexpensive wicker baskets. They come in handy when you are harvesting your crops. If you don’t have a thrift store nearby, try one of these.

Black Zip Ties

Zip Ties

Zip ties may be good for is organizing cords and wires, but they have multiple uses in the garden. From securing your vining plants on a trellis or pole to using them to help construct your own trellis or tomato cage, zip ties are indispensable in the garden. Buy now

<span class="has-inline-color has-vivid-red-color">Tequia Burt</span>
Tequia Burt

Tequia Burt is a Chicago-based editor, writer, content creator, and brand storyteller with 20 years of experience. In addition to being the Editor in Chief of Backyard Chicago Garden, she is the Founder-CEO of Content[ed.], which provides custom content and strategy to businesses.

Urban Foraging: Garlic Scape Pesto Recipe

If you live in the city, eating local may be as simple as taking a walk around your neighborhood. That’s what I was doing when I spied the bountiful stalks of garlic scapes right outside my garage. So, my neighbor and I set to foraging, but left a few to flower so they continue their spread next year.

I made a delightful Garlic Scape Pesto with my foraged find!

How to Prepare Garlic Scapes

Unless you have experience with them, you probably have no idea what to do with scapes. When I first saw them at my farmers market years ago, I definitely had to do some research. After trimming the flower, you want to snap off the end where it begins to get woody—like you would do with asparagus. (See above.)

You should use the tender middle part for your scape pesto. (See above.) If you want to tame the bite of the garlic a bit, you can always blanch them first to mellow out the scapes.

Garlic Scape Pesto

tequiaburt
You can use this yummy pesto as a spread for bread and sandwiches, for pasta and even as a marinade. Tonight, I’m going to use as a sauce for delicious chicken breasts. Bon Appetit!
Prep Time 15 minutes

Equipment

  • Food Processor

Ingredients
  

  • 10-12 Garlic Scapes
  • 1/4 cup Pine Nuts
  • 1/2 cup Olive Oil
  • 1/4 cup Parmesan or Asiago Cheese
  • 1/2 cup Basil Leaves
  • 1 Lemon
  • 1/4 tsp Salt to taste

Instructions
 

  • Put chopped up scapes, basil, nuts and cheese in food processor. Pulse for about 30secs in short bursts.
  • While blending, slowly drizzle in first olive oil and then the juice of one lemon. Blend to desired consistency.
  • Add salt to taste.
<span class="has-inline-color has-vivid-red-color">Tequia Burt</span>
Tequia Burt

Tequia Burt is a Chicago-based editor, writer, content creator, and brand storyteller with 20 years of experience. In addition to being the Editor in Chief of Backyard Chicago Garden, she is the Founder-CEO of Content[ed.], which provides custom content and strategy to businesses.

Celebrate Juneteenth By Planting These Traditional African American Heirloom Seeds

After the killing of George Floyd and Breonna Taylor at the hands of police in Minneapolis, Minnesota, and Louisville, Kentucky, respectively, I pressed the pause button on this blog; posting about gardening as people stood up for black lives across the country felt, well, trivial.

But as the civil unrest around me grew, I turned to my garden for succor. Putting my hands in the earth, nurturing new life has comforted me these past few weeks.

Every year in my garden, I try to grow at least one African-American heirloom crop. So, in honor of Juneteenth, which marks the liberation of our ancestors held as slaves, I offer this list of African American heirloom seeds that you can try in your garden today.

Tree Collard

Although the actual origin of tree collards is unknown, it is said to have originated in Africa and have been passed down through generations of black farmers. They are perennial in warm climates and can grow up to 10 ft tall, though they are usually a more manageable 4-5 ft. They are hardy to 20-degrees, but gardeners in chilly climates like me can bring them inside the garage or basement.

I grew tree collards last year and it is going to seed in my garden right now. This is exciting because they rarely go to seed and I can’t wait to collect them. Generally, since they rarely go to seed, they are grown through propagation. They used to be hard to find unless you knew a gardener that shared, but now you can find cuttings or plants from multiple Etsy sellers or from Project Tree Collard.

Fish Pepper

undefined

Arriving in North America via the Caribbean, fish peppers have historically been popular among the African-American community in Philadelphia, Baltimore and the Chesapeake Bay region. A beautiful striped pepper that has traditionally been used in seafood dishes, it nearly went extinct but has been rescued by several seed savers. Baker Heirloom Creek gives us a rundown of this unique pepper’s history:

“This one-of-a-kind pepper would be lost to us if not for an unusual exchange. Horace Pippin was a black folk painter who served during World War I in the 369th Infantry called the ‘Harlem Hellfighters.’ He lost the use of his right arm after being shot by a sniper, and this left him with arthritic pain. Searching for some relief, he resorted to an old folk remedy that called for bee stings. Horace began giving seeds to a bee-keeper named H. Ralph Weaver. Horace’s seeds sometimes came from his far-flung old-time gardening friends, who sent wonderful and rare varieties. H. Ralph Weaver saved the seed in his private seed collection, where it remained until 1995 when his grandson William Woys Weaver released it to the public.”

Though you can purchase seeds via Baker Heirloom Creek next year, it’s a little late in the season to be starting pepper seeds. Never fear; this Etsy seller still has some plants for sale.

Jamaican Burr Gherkin

undefined

Originating in West Africa and brought to the Caribbean via the Transatlantic slave trade in the 1500s, this small gherkin tastes like a cucumber. It can be eaten raw, pickled, or cooked like squash.

The burr gherkins are still popular in the Caribbean—in the Bahia region of Brazil, Afro-Brazilians call them maxixe (mah-SHEE-shay) and use them in a traditional dish called maxixada (mah-shee-SHAH-dah). I grow a similar plant called the Sour Mexican Gherkin, and I can’t WAIT to grow this plant! You can find the seeds from Etsy Seller Plants With A Purpose.

Plate de Haiti Tomato

undefined

According to Food Historian William Woys Weaver, African American heirloom tomatoes are difficult to find and document. Dr. Carolyn Male shared this creole variety with him in 1992, and he, in turn, offered them through Seed Savers Exchange.

In his book Heirloom Vegetable Gardening, he writes: “The earliest record of this tomato is a botanical drawing in Konrad Gessner’s Historia Plantarum (1561). Gessner’s specimens were doubtless grown from seed only recently brought from the Caribbean. Whatever its true origin, the tomato has been associated since the 1550s with the island now home to Haiti and the Dominican Republic. It is known to have entered North America in 1793 with the Creole refugees who fled the slave uprising in Haiti. Beyond this, documentation of the tomato has remained elusive; little effort was made in the nineteenth century to investigate the plant varieties grown in the kitchen gardens of American blacks.” You can find this variety at True Love Seeds.

Roselle

undefined

One of the crops I’m most enthusiastic about growing this year is Roselle, which is native to West Africa. Also known as Sorrel, Florida Cranberry, and Flor de Jamaica, most people in the U.S. know it as Hibiscus tea, popularized as Celestial Seasonings “Red Zinger.” In the Caribbean, it is best known as the main ingredient in the holiday drink Sorrel.

Although a perennial in tropical climates (hardy in zones 8-11), it’s best grown as an annual in colder climates. Roselle produces big, beautiful blooms in the summertime, and, after the flowers fade, you can harvest the calyxes for jellies, teas, and Agua de Jamaica. (Find a recipe for Agua de Jamaica here.) It is definitely too late to grow Roselle from seeds this year because they have to be started indoors a couple of months before your frost date. But purchase them next year from Baker Creek Heirloom Seeds.

<span class="has-inline-color has-vivid-red-color">Tequia Burt</span>
Tequia Burt

Tequia Burt is a Chicago-based editor, writer, content creator, and brand storyteller with 20 years of experience. In addition to being the Editor in Chief of Backyard Chicago Garden, she is the Founder-CEO of Content[ed.], which provides custom content and strategy to businesses.

Coronavirus Gardening: 5 Plants to Grow in Your Urban Victory Garden

When I started my first garden, I picked all sort of vegetables without really thinking about how much space they took up, whether they thrived in a Chicago climate, or whether I actually even liked the taste enough to invest in growing them. Sadly, my first garden was not that successful. But that first year didn’t stop me, and by now, in my sixth year of gardening, I’ve learned which veggies thrive in my small, backyard plot.

The following is a list of vegetables that any starter garden should have. They thrive in MOST climates, taste better than store-bought, and are easy to grow in containers in tight spots or in raised beds.

Tomatoes

Of all the veggies on this list, tomatoes take up the most space and require the most care—some varieties can grow up to 12 ft tall (!) and the plants require staking, pruning and fertilizing. However, once you taste your own sweet home-grown tomatoes, you’ll never want to buy a grocery-store tomato again.

When to Plant: In Chicago and other locations in this region, plant tomatoes in mid-May to June. In warmer climates, gardeners can plant them earlier in the season—just be sure to plant them well after your last frost.

Growing Requirements: Many resources will tell you that you can grow tomatoes in three- to five-gallon containers—don’t believe them. Personally, I grow my tomatoes in 15-gallon grow bags, but you can get away with using a 10-gallon container per tomato plant. If you’re growing in a raised bed, limt to just a couple of seedlings and plant them at least 2-3 ft apart because they take up a lot of room. Tomatoes also need to grow in a space that gets FULL sun. If your back porch, balcony or yard is shaded in the least, your tomatoes won’t flourish; the plants need at least eight hours of direct sunlight a day. However, if you live in a super-hot and sunny environment, tomatoes may struggle in the heat so try planting them in shadier spots.

Varieties: One of the most important things to know about tomatoes is that there are two varieties: determinate and indeterminate. Though both are suitable for containers, determinate tomatoes, which include most kinds of Roma, Early Girl, and Celebrity, are more compact than indeterminate varieties. Referred to as bush tomatoes, determinates grow to about 4-5 ft tall and require less staking and pruning of “suckers” than indeterminate varieties. The fruit also ripen all at once, so you’ll get one harvest over a period of about two weeks. Indeterminate tomatoes are less bushy and more vining, require staking and pruning and need bigger containers because they are larger than determinate varieties. You can taste all that tender-loving-care in the final product, though, which is reminiscent of that old-fashioned tomato flavor that your grandparents wax poetic about. On average, the plants reach 6 ft tall and include heirlooms such as Purple Cherokee, Brandywine, Beefsteak and Sweet Million. Once they ripen, they will continue to produce fruit over the season until killed by frost.

Leafy Greens

Greens such as lettuce, mustards, kale and collards are the easy to care for and don’t take up a lot of space, which is always a premium for urban gardeners. Plus, the more you cut and eat them, the more they will produce for you.

When to Plant: Ideally a couple of weeks before the last frost. But in Chicago, who knows when that could be? It snowed in late April this year—should this have stopped you from planting greens before then? Heck no! Most greens are cool-weather crops, so I would suggest starting them in March in places with Chicago-like temperatures. This would be even earlier for gardeners who live in less-tundra-like environments. It’s still not too late to plant some greens; I just planted baby collards, which tolerate the heat more than other leafy greens like lettuce.

Growing Requirements: The best thing about greens is that most of them don’t need much space because they have shallow roots. There are exceptions (hello, Lacinato, aka Dinosaur Kale, and collards), but for the most part you can choose small pots—I like to use those long rail planters for lettuce, for example. They do like sunny spots in cool weather, but to extend the life of your leafy greens move them to a shadier, cooler spot in your garden once the summer heats up. This will help them to resist bolting, which means the plant has begun to flower and has given the signal to reproduce and stop growing. Some leafy greens are easier to grow than others (I’m really terrible at growing spinach, for example, and avoid it at all costs), but for the most part they are pretty idiot-proof.

Varieties: The other great thing about leafy greens is that they are best direct sown, which means you can plant seeds directly in a pot outside. This means you aren’t limited to whatever plant that your local nursery is offering. There are so many varieties of seeds for each kind of leafy green—you cannot even begin to imagine how many types of lettuce there are in the world!

Peppers

Like tomatoes, peppers like it hot and sunny. There are so many different types of peppers with so many different flavors from candy sweet to fiery hot, you’re sure to find ones that all your family members can enjoy.

When to Plant: Chicagoland gardeners, don’t gamble with your peppers’ lives—wait and don’t plant them until at least June. The soil must be warm and the days sunny. I have learned my lesson.

Growing requirements: Again, most resources will say that you need smaller pots than you actually do for peppers. While it does depend on the type of pepper—sweet Jimmy Nardello peppers, and spicy Thai Chiles, for example, are small and can fit multiple to a pot—most peppers need a substantial size container if you want a good yield. I tend to use 10-gallon grow bags for each of my pepper plants, notwithstanding the smaller varieties. Just be sure to look up space requirements for the pepper you have; it won’t always tell you on the pot it comes in.

Varieties: If you like sweet or mild peppers, Shishito, pimentos, banana or bell peppers are good choices. If you like medium heat, try Anaheim, Poblano or Hatch chiles. If you like it roof-scorching hot, then Scotch Bonnets, Habaneros and Carolina Reapers are for you.

Bush Beans

For container gardens, I recommend growing bush beans rather than vining types, which requires a trellis and can take up a good amount of space in an urban garden.

When to plant: I like to direct sow peas—the seeds are cheap, growing them inside is more trouble than it’s worth, and it’s less expensive than buying plants at the nursery. In Chicago, planting seeds directly in your pot outside in late May-early June is perfectly good timing.

Growing requirements: The thing to know about bush beans is that you’re going to need more plants than you think—a lot more. A good rule of thumb is to grow four to eight plants per person. Thankfully, beans don’t take up too much space, so you can get about five to six plants in a 10-gallon container. Beans don’t require much fertilizing because they produce their own in a process called nitrogen fixing. Though bush beans perform better in full sun, you can also grow them in partial shade.

Varieties: My favorite green bean is called Calima. It’s a slender, stringless French bean that gets pretty high yields. Other popular bush bean varieties include Contender, Dragon’s Tongue (LOVE these; plus, they are beautiful!), Kentucky Wonder and Provider.

Herbs

Whenever I see the tiny, sad plastic packages of herbs at the grocery store, I smugly pat myself on the back because I am getting a great bang for my buck by growing lots of different kinds.

When to Plant: Some tender herbs like basil like it when it’s warmer out, so don’t plant those until late May early June. Other herbs such as chives, like it cooler, so plant them earlier in the year. It really depends on the herb.

Growing requirements: The cool thing about herbs is that you can usually tuck them into corners of pots that you’ve already planted other vegetables in. For example, I often grown basil plants along with my tomatoes in the same container. Otherwise, plant them in small pots that you can move around. Find out the lighting your herbs like best by testing out different spots in the garden.

Varieties: Once you’ve gotten growing basic grocery store herbs like basil, parsley, and thyme down, try fancier herbs. I’m growing multiple types of basil this year and experimenting with growing various herbs for medicinal purposes.

View Post

<span class="has-inline-color has-vivid-red-color">Tequia Burt</span>
Tequia Burt

Tequia Burt is a Chicago-based editor, writer, content creator, and brand storyteller with 20 years of experience. In addition to being the Editor in Chief of Backyard Chicago Garden, she is the Founder-CEO of Content[ed.], which provides custom content and strategy to businesses.

So, You’re Starting Your First Garden: 5 Things to Think About Before Digging In

When we bought our house six years ago, the first thing I decided to do was to grow a garden. My granny had a green thumb and passed it on to me. She grew up on a farm and, despite living in cramped quarters in our southside Chicago apartment, I grew up surrounding by all of her plants. She’d always talk, wistfully, about moving home to Mississippi, back to the family farm where she could grow her own food and do plenty of fishing.

As COVID-19 spreads and stay-at-home orders threw us in lockdown across the country, many of you began to think about taking up gardening. (That and making sourdough starters.) I began to notice that gardening supplies were sold out everywhere and friends were on social media posting about tilling their first gardens. I also realized that many of you are making the same mistakes I did when I begin gardening. When I took the plunge, I basically knew nothing. For the past five years, I’ve essentially learned how to garden through trial-and-error and research; YouTube videos became my best friend. Now that I’ve learned a few things, I thought I’d share them with you.

Before you dig that first hole, here are a few questions you might consider.

1. Why are you gardening?

Are you doing it as a way to relax and relieve anxiety? Are you attempting to become more sustainable? Is the spread of coronavirus creating food anxiety and your answer is to start a garden? Are you trying to supplement your diet with fresh veggies? Do you plan to do it for the long-term? Figuring out why you want to garden can help you determine what to actually grow and how much time, effort, and money you want to spend.

2. What’s your space like?

This may be the single most important consideration. Maybe you live in a tiny apartment with only a back porch or balcony rather than in a house with a backyard. Never fear—you can grow a garden in the tightest of spaces. Greens like lettuce and herbs like basil can be tucked in small out-of-the-way spots. If you only get filtered rather than full sunlight, you will have to pick plants that can tolerate partial shade like, for example, greens like collards, spinach, and lettuce. Veggies like tomatoes, peppers, and cucumbers thrive in full sun, and need at least eight hours a day.

3. How long is the growing season?

One of the banes of my gardening existence is the shortness of Chicago’s growing season. If you live in a similar climate, it’s too late to grow many plants from seeds. Peppers, some herbs, and some flowers have months-long growing seasons. If you want to start them from seed, you have to do so in February and March, inside under grow lights; your best bet is to source plants from local nurseries instead. However, you still have time to plant some seeds inside and direct sow seeds outside. I planted six different varieties of tomato seeds about a week ago, but your time for starting seeds indoors is running out.

4. What do you actually eat?

I wanted to grow everything under the sun when I first started gardening. I grew watermelons that never really ripened because of Chicago’s short growing season. The butternut squash grew out of control, taking over the whole plot, and no one in my household really liked butternut squash except for me. I didn’t realize that to get a decent amount of some crops, like beans or strawberries, for example, you have to sow WAY MORE than the two seedlings you planted. I didn’t have a true plan for my garden, and you could tell from my haphazard results. I began to think about the veggies that my family frequently eats, and from those, which veggies were inexpensive and easily obtained from the grocery store. I designed my garden around my family needs and have had a much better outcome.

5. How much do you want to invest?

Growing a garden is a commitment—nurturing seedlings, pulling never-ending weeds, regular watering and pruning, and spending lots of $$$. In fact, until you get the hang of it, it’ll probably be more expensive to grow your veggies than buying them from the store. But, the rewards of growing your own food is worth it—it’s a hobby that encourages you to be healthier, have a more sustainable relationship with the earth, and is a fantastic stress reliever. I wish you a happy gardening journey!

<span class="has-inline-color has-vivid-red-color">Tequia Burt</span>
Tequia Burt

Tequia Burt is a Chicago-based editor, writer, content creator, and brand storyteller with 20 years of experience. In addition to being the Editor in Chief of Backyard Chicago Garden, she is the Founder-CEO of Content[ed.], which provides custom content and strategy to businesses.

So, It’s Not Just a Weed: 3 Ways to Use Common Comfrey

One of my garden’s most resilient and beneficial perennial plants is comfrey. Long dismissed as an invasive weed, gardeners are giving it a second look because of its powerful fertilizing and healing capabilities. According to clinical herbalist Kathleen Wildwood, who founded the Verona, Wisc.-based Wildwood Institute, comfrey leaves, and especially the roots, contain a hefty amount of allantoin, a phytochemical, or plant chemical, that speeds up cell repair.

“Comfrey is so good at repairing bones that it is known as ‘knitbone,’ so the bone needs to be set correctly before you start using it,” she says. “Comfrey also has uses for the respiratory system, and can treat, for example, bronchitis and sore throats; colitis, stomach inflammation, and ulcers; and interstitial cystitis and overactive bladder.”

Benefits of Comfrey

It spreads vigorously and can grow almost anywhere—prolifically, so I keep it controlled in a pot. Gardeners primarily grow the container friendly cultivar Russian Bocking 14, which can be identified by its purple flowers. Often, it is used as a green mulch to feed other plants; I plan to till the leaves and flowers into the soil to enrich it for next year’s crop. I also intend to use comfrey to help me extend my garden’s vitality well into the winter by drying the herb and then using it make a salve for cuts and scrapes, as well as for long infusions to drink throughout the season.

Comfrey can be applied externally as a salve, ointment, compress—or even just its leaves—to treat, for example, joint inflammatory disorders, wounds, bone fractures, and gout, according to Wildwood.

“An infused oil or ointment made of comfrey leaves or root speeds healing of wounds so effectively that one caution is that you cannot use it on a deep cut, because it will heal the top over so quickly that you can end up with an infection underneath,” she says. “But if it is not a deep wound, it will heal wounds and strengthen skin. You can even just rehydrate a large leaf with hot water, wrap it around a twisted ankle, then cover with plastic wrap or a towel.”

Precautions

Wildwoods cautions that before you make any kind of infusion, however, you should be sure you’re using the correct species of comfrey, Symphytum uplandica x. She says the best way to identify safe comfrey is by the color of the flowers. “The one with the purple or blue flowers is safe internally or externally because they have been bred to eliminate toxic pyrrolizidine alkaloids,” Wildwood explains, which can damage the liver.

Internally, Wildwood says comfrey can be ingested as an herbal tea or infusion to treat, for example, gastric ulcers, rheumatic pain, arthritis, bronchitis, and colitis, and it’s her favorite way to use the dried leaves.

“Clients who have torn muscles, popped tendons, twisted ankles or who have fragile skin are all helped by using comfrey leaf long infusion internally for several months, allowing those body parts to be less fragile, more-stretchy, and resilient,” she says. “For this reason, it is also helpful for women older than 40 who want to become pregnant. In addition, the amino acids in comfrey are useful for brain development in a fetus.”

Are you ready to make your own ointment and long infusions? Check out the following recipes.

Recipe: How to Make a Long Herbal Oil Infusion

  1. Fill a one-pint jar with a tight-fitting lid about halfway to two-thirds full with dried comfrey leaves. Cover leaves with preferred carrier oil (such as olive, avocado, coconut, or grapeseed).
  2. To make a long oil infusion, leave for six weeks and shake the jar a couple of times a day. After six weeks, strain the oil through cheesecloth.
  3. Add a 1/2 teaspoon of vitamin E to help preserve the oil. You can also add a few drops of essential oils like rosemary, lavender, or chamomile to make your oil even more beneficial.

Recipe: How to Make an Herbal Salve

  1. Melt 1/3 cup beeswax pastilles in a double-boiler.
  2. Add about 1 1/2 cups of infused comfrey oil to the melted beeswax.
  3. Pour into jar or metal tins and cool.

Recipe: How to Make a Long Herbal Infusion

  1. Take one ounce of chosen dried herb, such as comfrey.
  2. Place in a canning jar. Use a one-quart jar for leaves (such as comfrey), or hardy flowers (such as red clover), one-pint jar for roots, barks, or berries (such as burdock root or rose hips).
  3. Cover completely with boiling water, stir with chopstick or knife and add more water until full.
  4. Place lid on and let sit four-to-eight hours for leaves or hardy flowers, eight hours for roots. Many people make their infusions in the evening and then strain them in the morning.
  5. When done brewing, strain and refrigerate. Infusion will keep for 48 hours in the refrigerator. (After that, the proteins start to break down and the brew will taste off.)
  6. Infusions may be reheated (preferably do not boil, but it is still OK to drink if it does), iced, sweetened, milk added, etc. Some do well with salt or tamari, such as nettle.

Recipe courtesy Kathleen Raven Wildwood, © 2015.

Story originally published at Spirituality & Health.

<span class="has-inline-color has-vivid-red-color">Tequia Burt</span>
Tequia Burt

Tequia Burt is a Chicago-based editor, writer, content creator, and brand storyteller with 20 years of experience. In addition to being the Editor in Chief of Backyard Chicago Garden, she is the Founder-CEO of Content[ed.], which provides custom content and strategy to businesses.

4 Super Greens to Grow in Your Spring or Fall Garden

By Tequia Burt

Greens are not just for salads. With different kinds grown all over the world, greens can taste sweet, bitter, spicy, or earthy and can be used in a wide variety of stir fries, soups, pasta, smoothies, and more.

Not only are they delicious, but greens pack a powerful health punch. They are an important part of a healthy diet and are usually abundant in a variety of vitamins, minerals, and fiber. Eating a diet rich in greens can help you improve your blood pressure, boost your immune system, enhance your cardiovascular health, and even sharpen your mental capabilities.

Greens are easy to grow in the early days of spring and don’t take up much space. If you’ve missed the spring window, which is easy to do in Chicago, you can plan these as fall crops. Whether you have a garden in your back yard, a deck, or patio, you can grow greens. With shelter in place orders cropping up across the country as the coronavirus spreads, it’s never been a better time to focus on your garden. Try growing these four super greens to both support your health (mental and physical) and stock your larder.

Orach

Orach

Orach is an ancient green experiencing a comeback after 4,000 years. Though its origins are difficult to pinpoint, it has been mentioned in the texts of ancient Roman philosophers and held the honor of being the most popular leafy green in Eurasia before spinach even appeared on the scene, according to the Baker Creek Heirloom Whole Seed Catalog.

Containing twice as much vitamin C as lemon, Orach is jam-packed with vitamins, including magnesium, anthocyanins, phosphorous, iron, protein, zinc, selenium, tryptophan, vitamin K, carotenes, and dietary fiber. An immune boosting powerhouse, orach may improve digestion, heart health and is a potent anti-inflammatory.

Orach can be eaten raw or substituted in any recipe requiring spinach or chard. This Thai Green Curry with Red Orach recipe showcases the green’s versatility. It comes in a dazzling array of colors, so not only will you get a vitamin-packed green, but it also looks lovely in the garden or in a planter on the back porch. Orach is adapted to both heat and cold and even grows in poor soil. Start seeds in the spring as early as the soil can be worked. Though it is slower to bolt than spinach in summertime heat, try to sow seeds in a place that gets partial shade. With germination temps of between 50 to 65 degrees Fahrenheit, seeds should sprout within seven to 14 days. Buy seeds from Baker Creek Heirloom Seeds.

Mache

Mache

Just one ounce of mache, aka corn salad, contains 18 percent of your daily requirement for vitamin A, almost as much vitamin C as an orange, and as much iron as spinach. It’s strong antioxidant effect helps improve immune function and can be a powerful aid in fighting colds and flus. It may also help lower blood pressure, improve eye health and brain function, and ease osteoporosis.

With its slightly nutty flavor and buttery soft texture, mache is a versatile salad green that is popular with foodies and chefs across the country. Try this Mache and Herb Power Salad to take advantage of the deeply nutritious greens and spring herbs.

This tender green is an excellent cold weather crop and doesn’t require much care. It is so cold hardy that it can even be grown in winter and can even withstand temperature below zero. Though it often grows wild in corn fields and can be foraged, mache can also be grown in your garden or in a container. Since warmer temps can slow germination, it’s best to sow mache seeds in the ground as soon as you can work the soil. Since it is commonly grown in the U.S., seeds aren’t hard to find in local garden centers or from online vendors.

Molokhia

Molokhia

Molokhia—or Mulukhiyah, molohiya, mloukhiya, Egyptian Spinach, or Jute depending on where you are in the world—is a highly nutritious green common in Middle Eastern and Egyptian cuisine. It provides loads of fiber, potassium, iron, calcium, magnesium, phosphorous, and selenium, as well as vitamins C, E, K, A, B6, and niacin. This supergreen reportedly lowers blood pressure, improves circulation, digestion, sleep, bone health, and eyesight, as well as boosts the immune system and reduces inflammation.

With a texture akin to okra, molokhia is usually made into a soup or stew and can be eaten alone or with a protein. Though it is a perfect for planting in cool springtime temperatures, unlike most other greens, it thrives in the summer heat! The seeds can be sown directly in the ground in the spring after all chance of frost has passed and after 60 days harvested throughout the summer. When cold fall weather arrives, the green begins producing small yellow flowers and starts to bolt.

Molokhia is not commonly grown in the U.S, however, you can find seeds on Etsy. Try this recipe for Jute Mallow Soup to get all the benefits of this supergreen.

Mizuna

Mizuna

Mizuna—or Japanese mustard greens, spider mustard, water greens, or kyona—is a cruciferous vegetable related to broccoli, cauliflower, kale, and Brussels sprouts. Cultivated for centuries in Kyoto, Japan, mizuna is a cornerstone of Japanese and Buddhist culinary traditions.

Rich in vitamins A, C, and K, mizuna is a highly nourishing green. It contains multiple antioxidants, including anti-inflammatory and anti-cancer kaempferol and quercetin. What’s more, mizuna’s high levels of beta carotene, lutein, and zeaxanthin can improve eye health by fighting cataracts, diabetic retinopathy, and protecting your retina from oxidative damage and age-related macular degeneration.

With its slightly bitter and spicy flavor, mizuna can be used raw in salads or cooked or pickled.  The fresh peppery flavor complements a variety of other greens and salads, and it is delicious in soups, stir fries, pasta, and even on top of pizza. For a vegetarian pasta dish, try this Mizuna Pesto recipe.

One of the most bolt-resistant brassicas, mizuna is an excellent cold weather crop and should be sowed early in spring. Find mizuna seeds at Johnny’s Selected Seeds.

Originally published at Spirituality & Health.

<span class="has-inline-color has-vivid-red-color">Tequia Burt</span>
Tequia Burt

Tequia Burt is a Chicago-based editor, writer, content creator, and brand storyteller with 20 years of experience. In addition to being the Editor in Chief of Backyard Chicago Garden, she is the Founder-CEO of Content[ed.], which provides custom content and strategy to businesses.

Recipe: Simple End-of-Summer Plum Cake

Nothing says end of summer to me more than biting into a sweet, juicy plum.

This cake, which combines summer fruitiness with warm fall spices, helps ease the transition between the seasons. If you don’t happen to have a plum tree nearby, now is the perfect time to pick up a few stone fruit like plums and peaches at your local farmers market. This cake is so easy to make and requires such simple ingredients, you’ll likely already have them in the pantry.

End-of-Summer Plum Cake

Prep Time 30 minutes
Cook Time 1 hour

Equipment

  • Springform pan

Ingredients
  

  • cups flour
  • tsp baking powder
  • 1 tsp salt
  • cup sugar
  • 1 tsp cinnamon
  • ¼ tsp nutmeg
  • tsp cardamon
  • 2 eggs
  • 1 tsp vanilla extract
  • ½ cup milk
  • 8 tbsp butter (one stick)
  • 3 plums, each cut into 8 wedges (about 1 lb). Be sure tochoose firm, not overripe plums.
  • Sprinkle of powdered sugar (optional)

Instructions
 

  • Set oven to 350 degrees.
  • Cream butter and sugar with mixer for a couple of minutes, until soft and fluffy. Stir in vanilla and eggs. Set aside.
  • Whisk together flour, baking powder, salt, cinnamon, nutmeg and cardamom.
  • Alternate mixing flour mixture and milk into creamed butter until thoroughly combined.
  • Pour thick batter into a greased cake pan. I like to use a springform pan so everyone can see the prettiness of the cake.
  • Place plum slices in a circular pattern on the cake until most of the batter is covered.
  • Bake in oven for 1 hour to 1 hour 10 min until done.
  • After cooled sprinkle powder sugar on top. (Optional)
<span class="has-inline-color has-vivid-red-color">Tequia Burt</span>
Tequia Burt

Tequia Burt is a Chicago-based editor, writer, content creator, and brand storyteller with 20 years of experience. In addition to being the Editor in Chief of Backyard Chicago Garden, she is the Founder-CEO of Content[ed.], which provides custom content and strategy to businesses.